3DPrinting

19739 readers
0 users here now

3DPrinting is a place where makers of all skill levels and walks of life can learn about and discuss 3D printing and development of 3D printed parts and devices.

The r/functionalprint community is now located at: or !functionalprint@fedia.io

There are CAD communities available at: !cad@lemmy.world or !freecad@lemmy.ml

Rules

If you need an easy way to host pictures, https://catbox.moe/ may be an option. Be ethical about what you post and donate if you are able or use this a lot. It is just an individual hosting content, not a company. The image embedding syntax for Lemmy is ![](URL)

Moderation policy: Light, mostly invisible

founded 2 years ago
MODERATORS
1
 
 
2


I'm having a rather strange problem with my Ender 3 V2 that's causing me to leave it unplugged and as a result underused.

I used to have my printer set up in my garage but one day noticed that the circuit breaker was tripping overnight resulting my refridgerator to turn off (not ideal.) I kept removing devices until I determined that it was caused by my 3d printer despite the PSU being completely flipped off at the back! This is obviously strange behavior and not ideal for a device that is outside of it's warranty period.

So I'm not sure how to proceed here. Firstly, what type of issue would cause this device to trigger a circuit breaker even when the PSU is turned off? Secondly, is there some way to fix this device that isn't a major PITA? Has anyone else experienced this as well?

3


Resin and filament, bonus points for laser sintering or anything else.

4


Super neat to watch. The final value surprised me. I won't spoil it.

5
1
tool to make an stl from 2D image? (piefed.cdn.blahaj.zone)
submitted 1 month ago* (last edited 1 month ago) by violetsoftness@piefed.blahaj.zone to c/3dprinting@lemmy.world


Hello friends,

my local fifth graders are doing a series of astronomy lessons which uses this mythical artifact as a focus. The class teacher thought it would be neat to try and 3D print the artifact and let the kids actually handle it vs the print version they are working with now.

collapsed inline media

The teacher got about this far before hitting issues that prevented printing. I have done a bit of 3-D printing on my ender so I gave it a try but I wasn't able to get even as far as the teacher did by the look of it.

Is anyone aware of any foss tools that might facilitate this or have time to help get us to a printable .stl from these 2d views? It's not supposed to be very thick just a sort of broken disc thingy. TIA!

6
7


Hi All,

This will be difficult to pin down, but getting pointed in the right direction would be helpful.

Purchased a FlashForge AD5X ~5 weeks ago. Worked great, one button calibration out of the box, I proceeded to do what everyone does when learning: print a bunch of stuff, mix success and stumble over the usual stuff. Ie: Learned why you clean the bed, learned how supports work, deal with filament breaks etc etc.

About a week ago I had a print fail, it looked like there was a broken filament that wasn't being pushed. I do a cold pull on the nozzle, and was able to print successfully for a time (although there were some small features on some prints that seemed sloppy compared to previous prints).

After that though ALL my prints started to fail. Even after cleaning the bed, double checking bed/nozzle temp, I'd get bad adhesion. I'd also get the nozzle dragging through layers, as if the Z was off (even after running calibration repeatedly and before each print). There was some popping and oozing, which I put up to not storing my PLA dry (although ambient was only ~40%). However the problem persisted even with a freshly opened vac-sealed (confirmed seal was good) roll of PLA.

I ordered a replacement nozzle that arrives today, but can anyone give me some insight? I only ran ~2kg of PLA through, that seems like really premature wear; I must have done something wrong.

Thanks for anything putting me in the right direction.

8


I've been working on this for a few weeks and figured I'd share it. It's currently on up on makerworld because there are so many parts and it's just so much easier to put together print profiles on bambu studio.

I've also made two videos you can access on the makerworld listing but I'll put them here too.
One just shows the clock and now it works and the other is a full detailed tutorial.

This was a really challenging project for me as I had to learn a bit about how gears work and motors.

Speaking of motors. The motor I used was chosen for its ease of use. But it's not really the right motor for the job. I'm looking for alternatives. I've ordered 4 or 5 other types of DC and AC motors. And I'll be testing those out to find one that spins around 30 rpm and is silent.

The current motor is very noisy. And too fast. And I don't have room for reduction gears. Plus those would increase the noise.

Anywho. Any comments, ideas, thoughts you have about improving design or motor suggestions are welcome.

I have done quite a few things to help reduce the motor noise. I discuss these more in the tutorial video (warning, it's long). Ultimately, the motor is an RC motor and base quality.

The other motors ive ordered are higher quality and one is synchronous, and will probably be best. Waiting for delivery to test.

https://makerworld.com/models/1783697

Info video https://www.youtube.com/watch?v=iTZRmflFgV8

Tutorial https://www.youtube.com/watch?v=P0JibVxZlNQ

9
1
submitted 1 month ago* (last edited 1 month ago) by neidu3@sh.itjust.works to c/3dprinting@lemmy.world


So I've decided to get "back" into 3d printing. I was getting into it in 2012 and I started assembling a kit, but then life happened and I never had enough time or room to complete it.

However, now I'm in a much better place (both literally and figuratively), so I've decided to dive back in. However, last time around it seemed that almost everything was some variant of Prusa, and I think I want to go in a less DYI direction this time.

  • Once calibrated, doesn't need much fidgeting or maintenance.
  • More or less prefabricated. Some assembly is fine, but I don't want to sit there an dremmel a hobbled bolt again, or build a power supply.
  • I prefer one of those enclosed printers, as it will be in a location with minimal climate control.
  • Must not rely on any software that does not run on linux
  • I'm not too worried about printing speed. Print quality matters more to me.
  • Preferably one that is fixable if it breaks.
  • Single filament is fine.
  • Don't need wifi

Any suggestions?

Oh, and I still have a spool of ABS around here somewhere.. Is this still a reasonable material choice? Any other materials worth considering if I prefer the prints to be durable and not brittle?

This is where I could list a budget or preferred price range, but purchasing power parity and exchange rates probably complicates this, so let's just say "reasonably priced"

UPDATE: I ordered a Prusa Core One. I went for the kit, as I will hopefully better understand how I can fix it later after assembly. I threw in a spool of PETG as well, as I'm curious about the material.

10
11


So I got the 0.2mm Nozzle for my P1S to do some Detail Heavy stuff, while with PLA everything works perfectly Fine, Once I try to use any Roll of PETG HF it just refuses to Stick to the Plate!

I've been Mostly Testing on my Coolplate Supertack, but same issue happens on the Textured PEI. Both of them have no issues when trying PLA the Print before.

I've now tried a Range from 230c° to 250c° for the Nozzle and 60c° to 85c° for the Headbed with only limited result, as Only the Combination of 250c° and 85c° for the Heatbed got me the Brim around the Print to stick, but not the print itself.

What am I overlooking here? Is there some settings I need to adjust when switching Nozzles? Dp I need to go even Higher with the Temps? Maybe its the Flow Ratio? I've tried both the reset one and the one that was set with the 0.4 Nozzle with no real change. Cant run a new calibration for it since nothing sticks. Both spools of Filament have been dried for 48 Hours, with a few hours of resting before use ofcourse.

To note, PETG HF works perfectly fine on the 0.4 Nozzle and both Plates have been cleaned multiple times now... as seen to work with PLA. What settings work for you folks? Anyone with simular issues?

12
13
1
submitted 1 month ago* (last edited 1 month ago) by Obi@sopuli.xyz to c/3dprinting@lemmy.world


Edit: wow I'm overwhelmed by all the help I received in this thread, I was gonna reply to everyone but it's gotten to a lot. You've all given me a lot to think about, thank you so much.

Hello there, hope everyone is doing well. I could use a bit of help/wisdom choosing my first FDM machine.

I get it, the technology has advanced a lot and I'm so lucky to be getting into this when I am, spoiled for choice with great options which is kind of the problem.

Realistically, my main goal is building functional, engineering style parts for my work as a cinematographer, think things like custom viewfinders, cable ties, precision rollers, and general parts and accessories for my rigs.

I do have a kid and family home too so I'll definitely want some toys for him and knick-knacks for the house but that's secondary.

So I know I need an enclosed core-XY with high temp hardened steel nozzles/heated bed for these special abrasive engineering materials.

I don't want 3D printing itself to be my hobby, but I definitely know how to tinker, I'm also not half bad with CAD/3D modelling.

Folks recommend Bambu but I'm also conscious of much cheaper options available that would do what I need.

I think I'm almost settled on the elegoo Centauri Carbon, but I'm worried about regretting not having multi-color right away (they're supposedly bringing an AMS style add-on but it's not there yet), and even when it does, it'll have the massive waste issue all these systems have.

So then there's the brand new options that are just coming out like the Snap maker U1 which sounds amazing but I dunno about getting something so new and apparently they don't have great track record.

Also looked at creality, flash forge, Audi Q2.... It seems I discover a new brand/option every day even after a month of research, lmao.

So, what are your opinions? What would you get as someone in my situation? I'd rather not spend too much on the printer (hence not listing Prusa) but I also don't want buyer's remorse and wanting to upgrade in a few months, ideally I get a work-horse that'll serve me for years to come right away and skip the upgrade paths...

Thanks in advance for your thoughts 🙏

14


So I've been wanting to make those Clear Keychains for some of my Artist Friends that we saw at a Convention, with my first idea being Resin 3D Printing, a thing that I am very much unfamiliar with!

My Idea is to 3D Print out a Transparent shape, then Print the same shape but mirrored, then take both and Sandwich a Paper Print picture of one of my Friends Characters between the 2 and bind it all together!

There is a concern that I have Before I go out and get myself setup with a Resin 3D Printer... how Clear is Clear Resin anyway? All I can seem to find Online is Prints made by the Resin Sellers, which lets be real, cannot be trusted on its own. Given that the Paper Picture Sandwiched in the 2 Resin Shapes needs to be very Visible, the Resin Shape must be basically Near Perfectly Clear. What is your Folks experience with Clear Resin? Would you recommend using a Resin 3D Printer for this or should I go look for other Methods?

Edit: Thanks too all of you for shimming in with your Many Detailed Experiences, Ideas and Suggestions! After considering everything, I've decided that the best Route I should take is utilising a Laser Cutting Machine with Acrylic. A thing I've somehow not considered before! I want to choose the Lasercutting method in Particular as I think it'll also allow for many other Possibilities to Create things in the Future! Now I do have to do my Research on what machines are on the Market for Transparent Acrylic, as from what I've read only certain Laser Types can Handle those. But I think I'll find something that Suits me! Much thanks for everyone who Commented here!

15


I am not an engineer. I'm not even good at math, and my spatial reasoning skills are nonexistent. With that in mind, here are the CAD programs I've tried.

Blender, Pros: Free, surprisingly comprehensive. Cons: Not parametric, can't precisely measure or constrain models, all the extra stuff you get like rendering has no use in 3D printing.

Onshape: Pros: Easy to use, convenient (I've successfully edited a model on my phone), free*. Cons: Runs ~~on someone else's computer~~ in the cloud, not private, enshittification is sure to come shortly if history is any indication.

Fusion360: Pros: seems to be what everyone else is using. Cons: enshittification is already happening, runs locally with limited saves in the cloud so you don't own your files but also don't get the run anywhere convenience of the cloud.

Plasticity: Pros: buttery smooth workflow, pay once run forever, runs and saves locally. Cons: Not peremetric so hard to go back and adjust things later.

FreeCAD: Pros: free, open source. Cons: workflow as rough as sandpaper, constantly crashes.

Plasticity and Onshape have proven to be the most productive choices for me. If only Plasticity were parametric it would be the perfect software for me personally.

I want to like FreeCAD, I really do, but it's so hard to use. I love Plasticity, but it's meant for making 3D assets for games etc. using hard surface modelling, not so much for manufacturing.

If I may digress for a moment, I work as a network admin. I'm familiar mostly with Cisco at work, but use Ubiquiti at home. Cisco equipment is monstrously expensive from a consumer or prosumer perspective, and the only way to get true hands-on experience is to buy used equipment from ebay which may still be pricey.

Ubiquiti's market strategy seems to be to make the kind of gear that a network admin would want in their home. It's inexpensive relative to the big fish like Cisco, but has a fairly comprehensive feature set. The idea is to entice Joe IT guy to buy Ubiquiti gear for his house, fall in love with it, then push for the company to switch to Ubiquiti the next time they upgrade.

What I want is the Ubiquiti of CAD programs. Easy to use, low barrier to entry but comprehensive enough to use professionally.

Suggestions/comments?

16


Estes is offering a $40 kit so you can print your own model rocket parts. Loved building models as a kid, might be fun to do again.

17


collapsed inline media

I loved this glass bed. After so much time trying to get anything to stick to the stock ender 3 bed, this glass bed has things sticking almost TOO well.

It was fine enough for PLA, but I've been playing with PETG lately and it sticks a little harder.

Well today I printed the entire bed flat for a little hiking table I'm experimenting with.. and this happened when I tried to get it off...

Suggestions for replacement? Should I go glass again? I don't have bltouch so I like how flat glass is, set it and forget it. But I've seen those magnetic plates that allow for super easy removal but just flexing the plate, but this bed is aluminum I think. Plus that seems similar to the stock ender 3 plate that I despise.

18


I know that many mods for some printers aim to enlarge the volume, but I've been considering downsizing somewhat my plus, as I have moved to a smaller house and the plus is a bit too large. An option would be to trade for a regular Ender 5, but I have had one, and the plus is better in many respects. Just the 4 guide/2 bed screws put it in a different league.

I really like the plus, I have modded it (hotend, direct drive, Klipper, board...), and have it pretty well dialed in, and I'm going to convert to "CoreX", a cheaper hybrid alternative to CoreXY, that removes a lot of weight from the gantry, ergo, higher speed and accuracy.

I'm going to end up with a respectably fast and accurate single color printer, and I'm considering adding the INDX tool changer.

I have googled, but either my Google-fu fails me or it's just too obscure of a subject.

Has anyone seen something like this?

19
20
21


Just a small rant but I hate that sites allow you to upload a STL without a picture of an actual printed model. It is dumb that you can make an image of it in photoshop or whatever software which you can tell is fake. I think you should have to print and take a picture. I think it would also help stop the AI posters that don’t flag their models as AI. Least makes it take longer for them to post.

Thanks for reading my Ted talk.

22


Discuss: How big of a disruption of the printer market is the H2 series printers going to be?

23


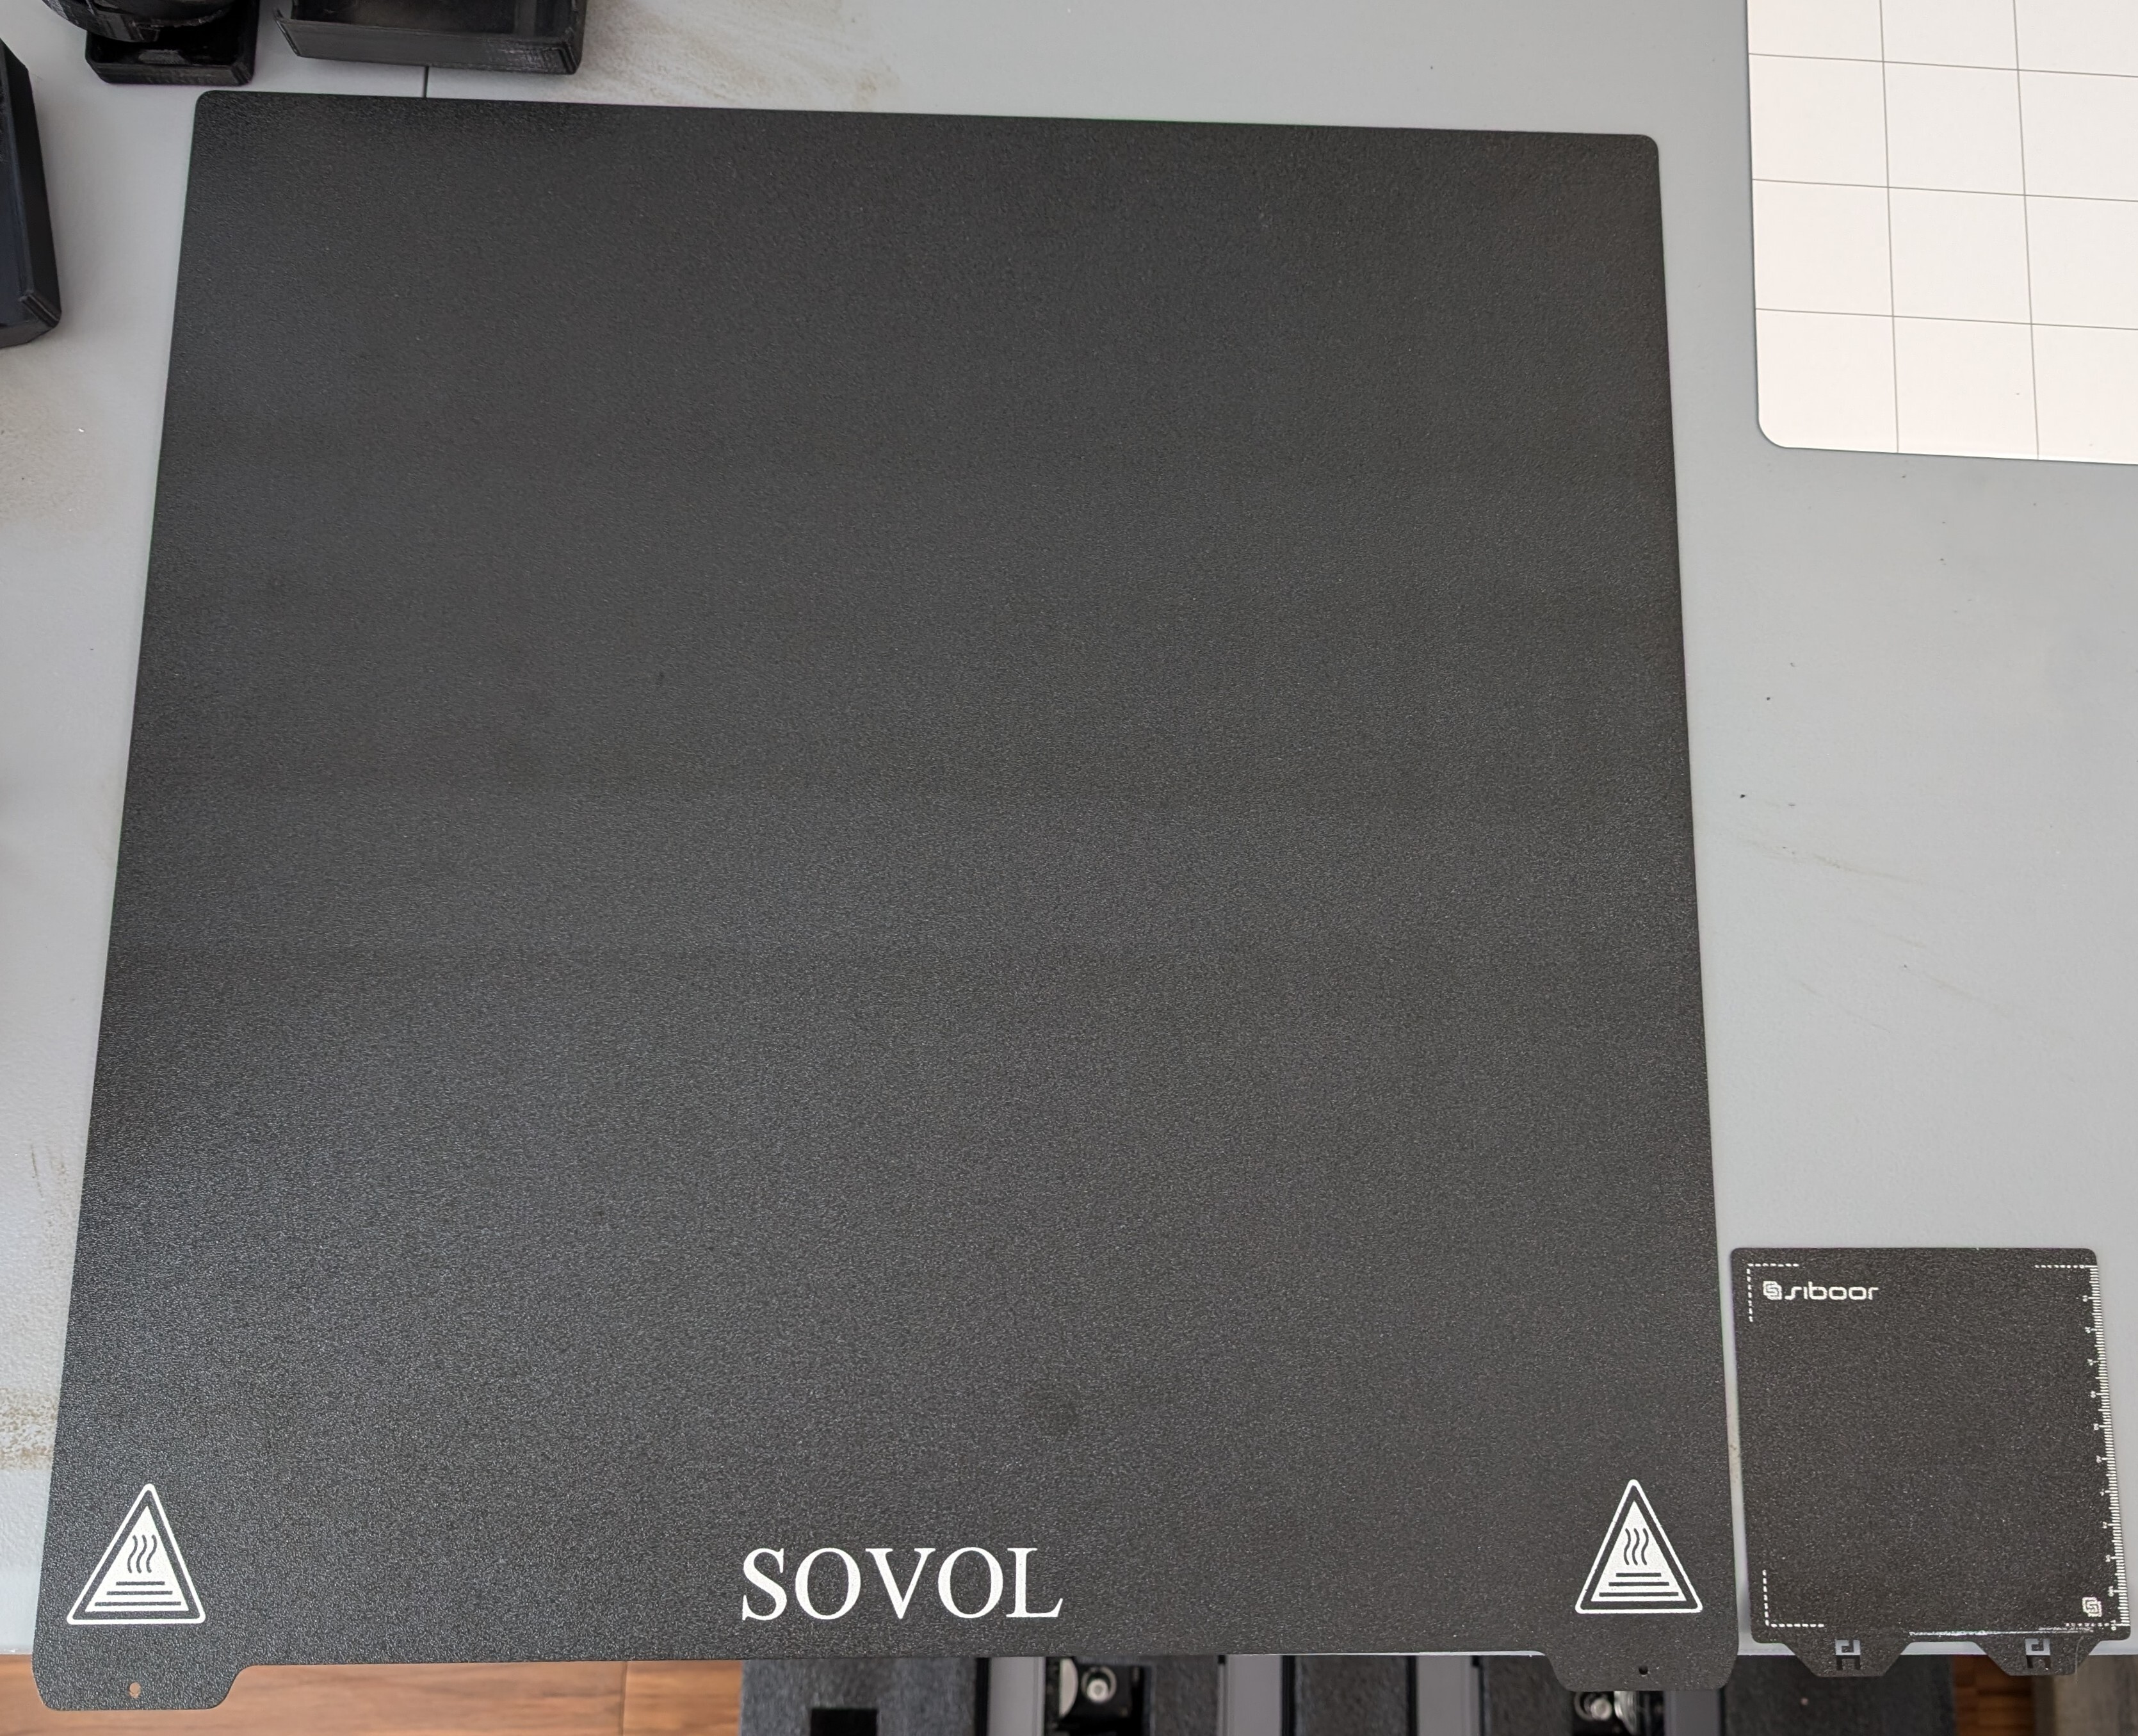
Built a Sibor Voron V0.2 earlier this year (right). Going a bit bigger this time (left).

24


When I originally designed my Virtual Boy Tripod Kit, it was the most complicated design I had done up to that point. However to make everything work I needed metal nuts and screw, plus an elastic band to hold everything together.

Since I started modeling my own screws, I wanted to go back to this kit and re-design it to be properly 100% 3D printed without loosing the functionality.

And this was my result. The body's shape is pretty much the same. However I am so please with how the mechanism works for the lock nut and thumb screw.

The screws are a bit tricky to print. But man this is so cool to slim this down.

25


I have a BambuLabs A1 and a textured PEI plate. I'm using PETG filament

I'm printing my first larger footprint project and isn't going great after dozens of flawless smaller prints. The model curls up at the corners (warping) while it is printing.

I attempted to help by adding a raft and brim, but it still happened. The plate has been freshly cleaned too, so there shouldn't be oils. I don't enclose the printer because my garage's ambient temp is typically pretty hot, between 95-110 degrees this time of year and rarely fluctuates. I say this not really knowing what enclosing the printer might bring it up to inside. I just haven't had any problems that required it so far... so?

After reading up on the problem my first thought was to increase the temp of the print bed to help keep the layers from cooling too fast. I usually use BambuStudio's default settings for PETG. But what temp to set it to?

Also, considering adding adhesive to the plate, but not sure what would work well with the textured PEI plate.

Any thoughts to help me out? Thanks!

view more: next ›